


Article
How can I connect my phone to my dermatoscope?
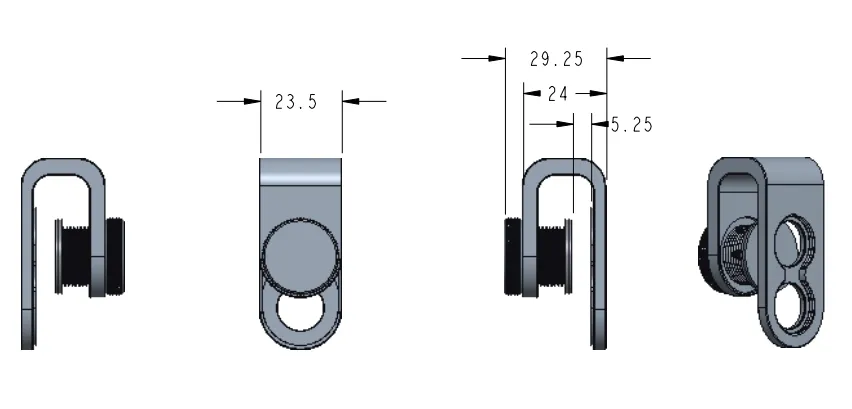
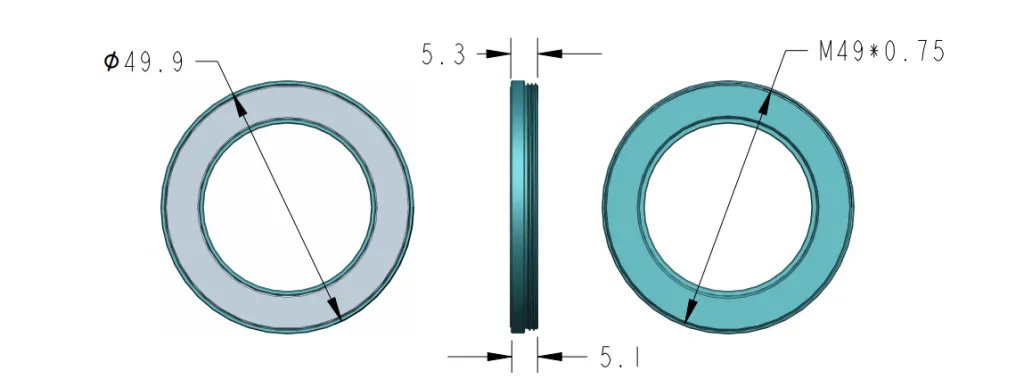
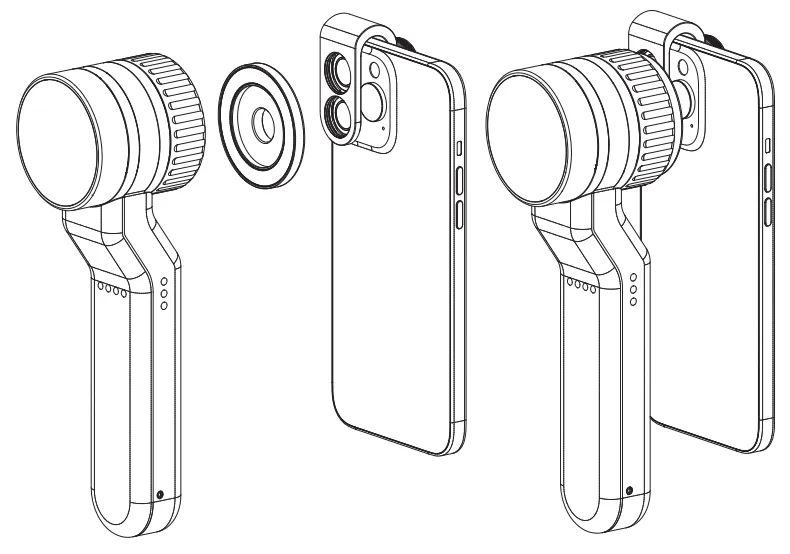
There’s universal phone adapter for all our dermoscopes. Please check the installation procedure bellow or watch operation guide. Smartphone Connector (1) Place phone adapter screw in the center of smartphone’s main camera.(2) Screw magnet attachment on phone adapter.(3) Put dermoscope’s back ring and magnet attachment together Take The Best Images You need to adjust the…
There’s universal phone adapter for all our dermoscopes. Please check the installation procedure bellow or watch operation guide.
Smartphone Connector
(1) Place phone adapter screw in the center of smartphone’s main camera.
(2) Screw magnet attachment on phone adapter.
(3) Put dermoscope’s back ring and magnet attachment together
Take The Best Images
You need to adjust the focus ring after the dermoscpe connected on smartphone to get the best images.
Dermatoscope for iPhone | Ultimate Guide to Perfect Photos | IBOOLO
Learn how to connect an IBOOLO dermatoscope to your iPhone. Get a step-by-step guide, pro photography tips, and troubleshooting advice. Explore our full guide now.
The Ultimate Guide to Dermoscopy with Your dermatoscope iPhone: Capturing Flawless Clinical Images
Modern dermatology is increasingly reliant on digital workflows, and at the heart of this transformation is the smartphone. For clinicians, the combination of a high-quality dermatoscope iphone creates a powerful, portable, and efficient diagnostic system. This synergy allows for the capture, storage, and sharing of high-resolution clinical images, fundamentally changing how we track and diagnose skin lesions. However, achieving a perfect connection and capturing superior photos requires more than just a simple adapter. This guide goes beyond the basics to provide a comprehensive, step-by-step tutorial on how to connect your dermatoscope to your iPhone and, more importantly, how to master the art of dermatoscope photography for professional-grade results.
Essential Tools and Preparation
The first step to a seamless workflow is ensuring you have the right tools. While many dermatoscopes are designed to be compatible with a wide range of devices, a stable and reliable adapter is non-negotiable.
Choosing the Right Smartphone Adapter
A high-quality dermatoscope adapter is the bridge between your optical device and your phone’s camera system. These adapters typically feature a screw-based or clamp mechanism to securely attach to your phone. For best results, it's wise to invest in a durable, well-made adapter that provides a snug fit. A solid connection is critical for eliminating shaky images and maintaining consistent alignment with the lens. For iPhones, many adapters are universal, but some are designed to fit a specific model, which can provide a more secure, precise alignment.
Setting Up Your iPhone for Optimal Photography
Modern iPhones feature advanced multi-camera systems that can sometimes pose a challenge. To ensure the best outcome, follow these steps before you even connect your dermatoscope:
- Select the Main Camera: Identify your iPhone's primary (wide-angle) camera lens. The dermatoscope adapter should be aligned with this lens for the clearest, most magnified image.
- Lock the Focus: Many camera apps offer a manual focus lock. Tapping and holding on the screen will often lock the focus and exposure, preventing the camera from automatically adjusting and causing a blurry or overexposed image. This is a crucial step for achieving consistent results in dermatoscope photography.
- Adjust the Settings: For the most professional-looking images, consider a camera app that allows for manual control over ISO, shutter speed, and white balance. This gives you complete command over the final image quality.
Step-by-Step Connection Guide
With your tools ready, connecting your dermatoscope to your iPhone is a quick and straightforward process.
Step 1: Secure the Adapter to Your iPhone
Carefully place the adapter’s base plate over your phone's main camera lens. For screw-based adapters, simply align the screw hole in the center of the lens. For clamp-style adapters, ensure the mechanism is securely fastened without obstructing the screen. The adapter should feel stable and centered, as any misalignment will result in an image with a dark, vignetted border.
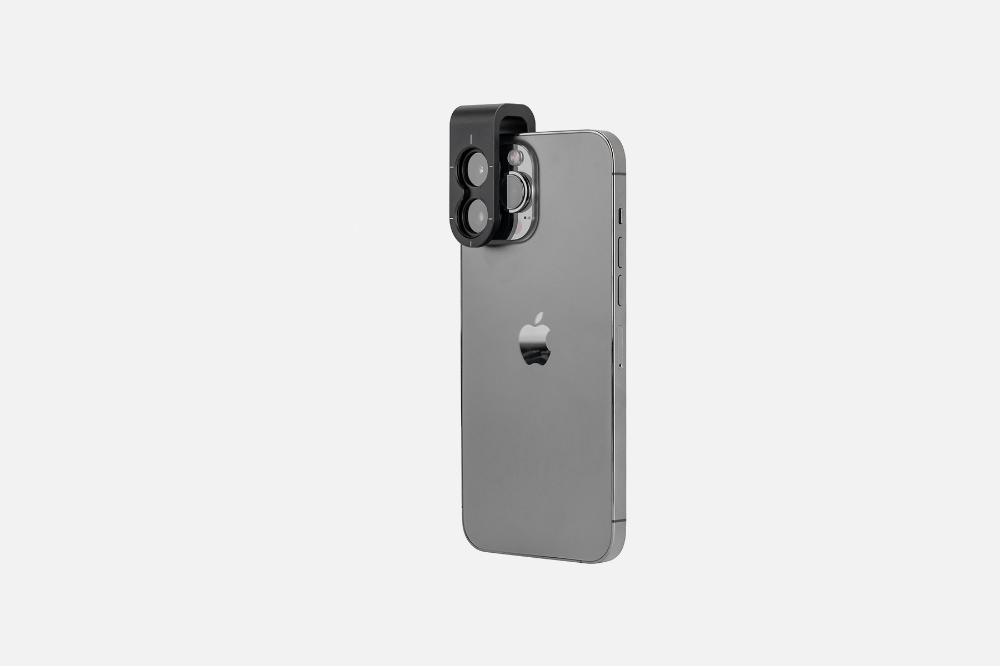
Step 2: Attach the Dermatoscope to the Adapter
Most modern dermatoscopes use a magnetic ring or an easy-clip system for attachment. Simply bring the back of the dermatoscope close to the adapter's magnet attachment. The magnets will pull the device into perfect alignment, providing a strong, secure connection. This magnetic connection allows for quick, easy mounting and dismounting of the dermatoscope, which is essential for a fast-paced clinical workflow.
Mastering Dermoscopy Photography with Your Smartphone
Connecting the devices is just the beginning. The real value of dermatoscope photography lies in capturing high-quality, clinically useful images. Follow these expert tips to elevate your skills.
Focusing for a Crystal-Clear Image
Once the devices are connected, the image on your phone’s screen may appear out of focus. This is a very common issue with dermatoscope iphone setups. To get a sharp image, you have to adjust the focus. Simply rotate the focus ring on the dermatoscope itself until the lesion comes into crisp focus on your screen. You may also need to tap the screen to tell your phone’s camera where to focus. Remember, a blurry image is a useless one.
Using the Right Lighting Mode
Dermatoscopes typically offer two primary lighting modes: polarized and non-polarized. Both are valuable and should be used strategically.
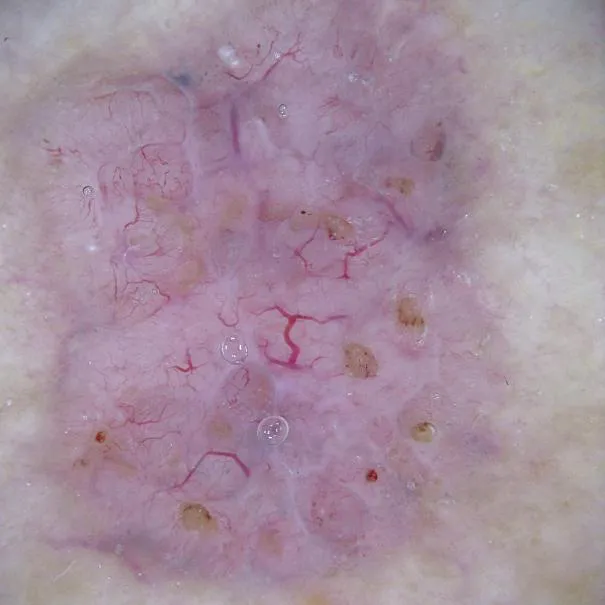
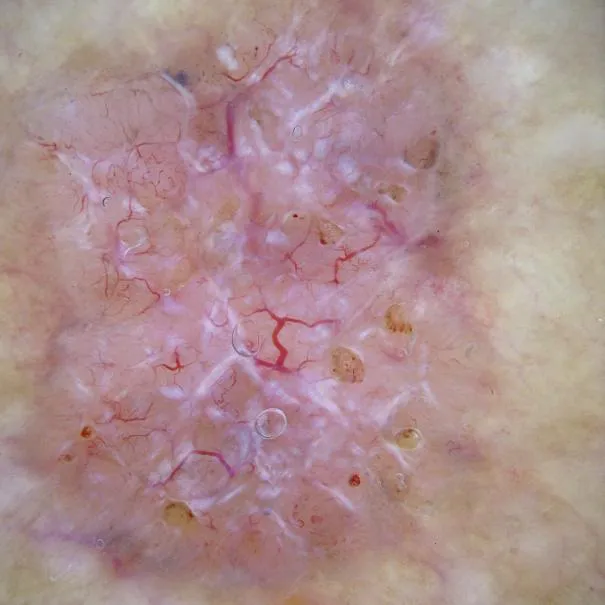
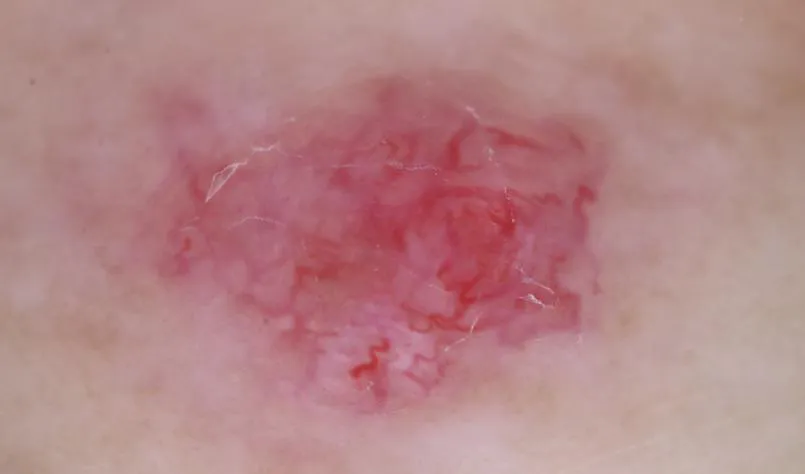
- Polarized Light: This mode uses cross-polarization to eliminate surface glare and reflections from the skin, allowing you to visualize deeper structures in the dermo-epidermal junction and superficial dermis. This is the best mode for examining vascular patterns and pigment networks.
- Non-Polarized Light: This mode requires a liquid interface (like alcohol gel) and is ideal for observing superficial skin features, such as scales, crusts, and follicular openings.
For a thorough examination, always capture images using both polarized and non-polarized modes to get a complete picture of the lesion's characteristics.
Optimizing Your Technique
- Maintain a Steady Hand: Unsteady hands can lead to blurry images. Use both hands to hold the phone and the dermatoscope firmly. For prolonged sessions, consider using a tripod or a phone stand to ensure stability.
- Check Your Exposure: The powerful flash on the dermatoscope can sometimes cause overexposure. Use your phone's screen to check the image and adjust the lighting or exposure settings as needed to avoid "hot spots" where a lesion's details are lost.
Troubleshooting Common Smartphone Dermoscopy Issues
Even with the best preparation, you might encounter a few hiccups. Here's how to quickly resolve common issues.
- Problem: The image is blurry or out of focus. Solution: Ensure the dermatoscope is securely connected. Clean both the dermatoscope and iPhone lens. Most importantly, adjust the focus ring on the dermatoscope itself until the image is sharp.
- Problem: There’s a harsh reflection or glare on the image. Solution: Switch to polarized light. This is specifically designed to eliminate surface glare and should immediately resolve the issue.
- Problem: The image has a dark circle or vignette around the edge. Solution: This is caused by a slight misalignment. Disconnect the dermatoscope and adapter and re-align it more carefully, ensuring the lens of the dermatoscope is perfectly centered over the iPhone’s camera lens.
Connecting a dermatoscope to an iPhone transforms a simple diagnostic tool into a powerful, digital-first system. By mastering the connection process and, more importantly, learning the professional techniques for dermoscopy photography, clinicians can capture superior images that enhance diagnostic accuracy, facilitate patient education, and streamline their practice's workflow. The ability to document, analyze, and share these images is not just a convenience; it's a new standard of care in modern dermatology.